
Prerequisites
Install latest software version matching the database version.
Initiating an MS Azure database connection
Here is how you connect a local workstation install to an Azure insolvency database:
1. Navigate to the UDLConnector.EXE
This is located in the insolvency application directory usually: C:\Program Files (x86)\Insol6\Insolvency\
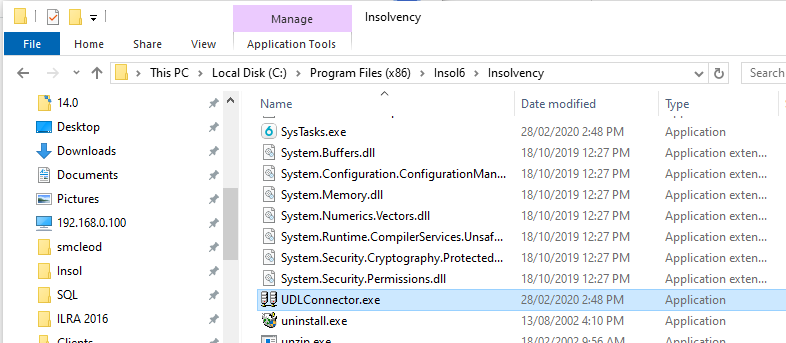
2. Run the Connector EXE
The UDL Connector appears:
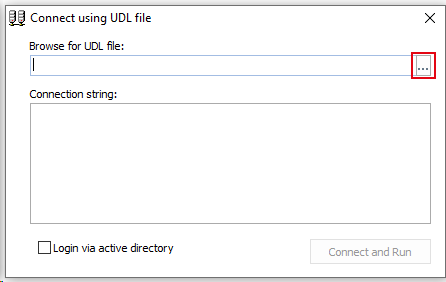
A select file dialogue box appears. Navigate the the UDL file.
3. Select the provided "azure.udl" file
The connection details are populated.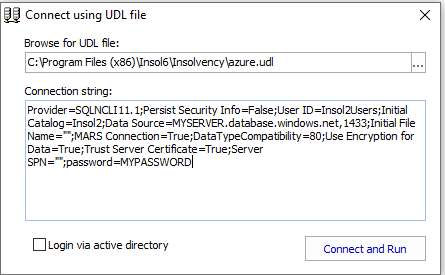
Provider=SQLNCLI11.1;Persist Security Info=False;User ID=Insol2Users;Initial Catalog=Insol6;Data Source= MYSERVER.database.windows.net,1433;Initial File Name="";MARS Connection=True;DataTypeCompatibility=80;Use Encryption for Data=True;Trust Server Certificate=True;Server SPN="";password=ENTER
Note
This is important for merging, DataTypeCompatibility=80.
4. Complete the password details.
5. Click "Connect and Run"
The software will now open and be connected to your Azure database.
Opening the application
Using the UDL Connector is a one-time connection process. Going forward, when you open the software the software remember the database connection details and automatically connects to the MS Azure database.
Note:
You will need a user added in the software database with a user name matching your current Windows logon to allow you to login to the software.
Issues connecting
Report any connection issues to support.
Comments
0 comments
Please sign in to leave a comment.