This process imports a .bacpac file (and insol6 database) which has been uploaded to an accessible Azure file store into the SQL Server in Azure.
Import database
To import the database,
- Login to Azure portal (portal.azure.com)
- From the server window, click 'Import database'

- Confirm subscription
- Select Backup
Under 'Storage', select 'Select backup'. The storage account screen opens.Click the storage account where the .bacpac file is located.
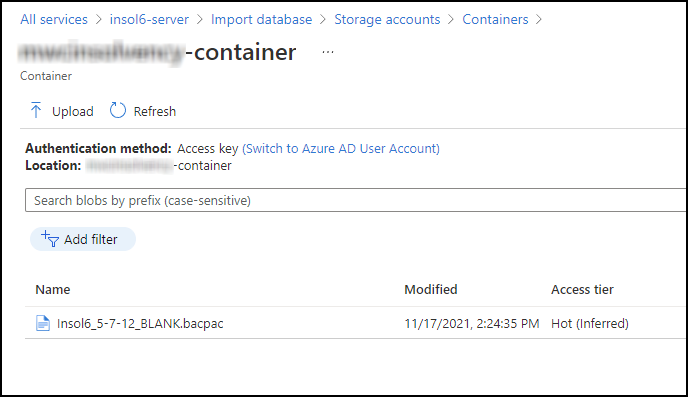
Click the container where the .bacpac file is located.
Click the .bacpac file and click 'Select' (bottom left of screen).
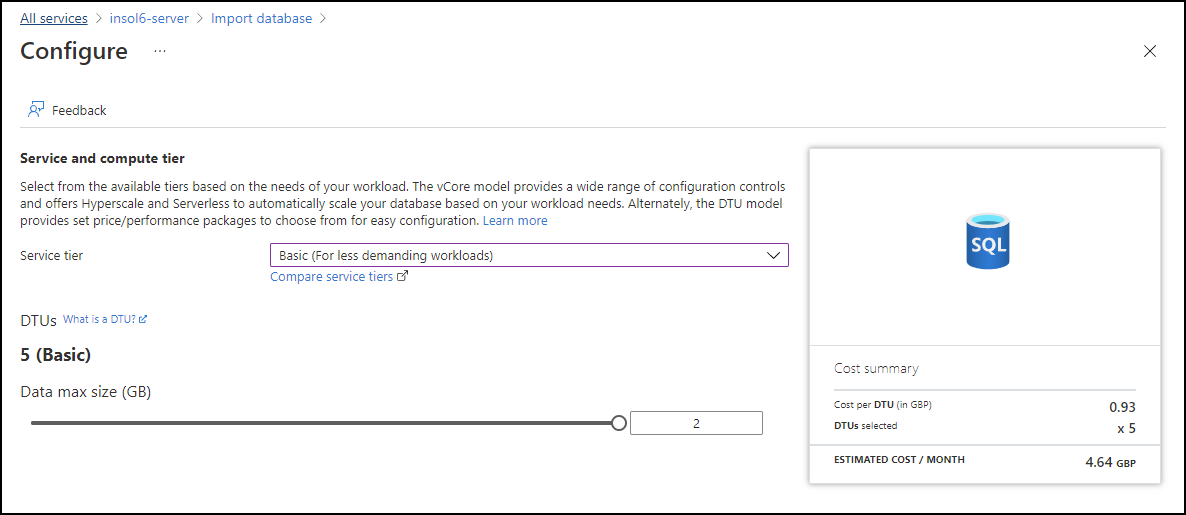
- Configure the compute tier and pricing
For new databases or databases under 2GB use the Basic DTU plan
For larger database use the Standard DTU plan
Click 'Configure database' and, for the 'service tier', e.g. select 'Basic' (5 DTUs), then 'Apply'.
- Change the database name
For the database name, change the default (the name of the .bacpac being imported) to '<client name>_Insol6'.
In the Import database window, update the collation to "Latin1_General_CI_AS" (Insol6 standard collation). This avoids collation issues in joins.
Check the server admin login and enter the password.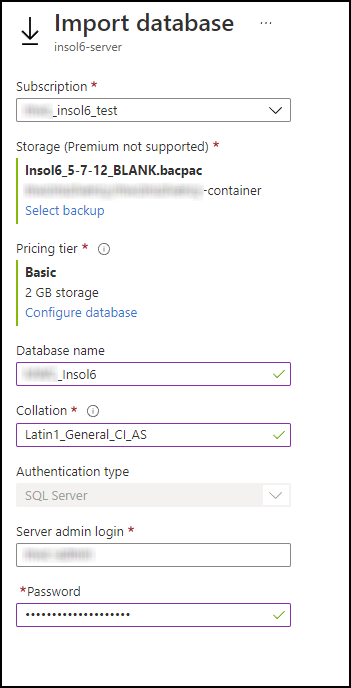
-
Click 'Import'.
Note
Ensure the DB credentials are stored in our key store database and communicated with the client.
KB article
Importing an Azure DB
https://exalt.zendesk.com/hc/en-us/articles/360002033576-Importing-an-Azure-DB-restoring-
Comments
0 comments
Please sign in to leave a comment.