This step creates a SQL Server instance in your subscription.
Click the 'Home' hyperlink (at the top of the left-hand panel, just above the storage account name).
Select the 'SQL Servers' option from the Azure services at the hop of the page. Select 'More services' if the option isn't shown.
Click "+ Create"
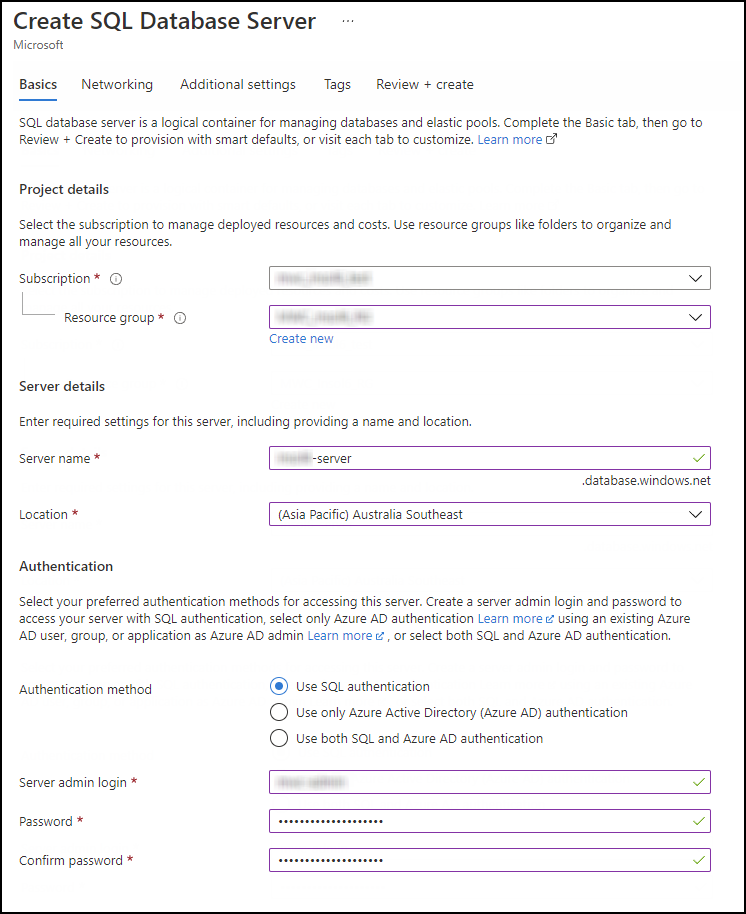
Add the following details into the 'Basics' section:
Resource Group: select existing resource group
Serve name: create new, e.g., '<client name>-server' (lower case letters, numbers and hyphens only)
Location: (Asia Pacific) Australia Southeast
In the authentication section:
Authentication method: select 'Use SQL authentication' but see note below
Admin login: e.g., '<client_name>-admin'
Password: {you will need to create a suitable password which complies with Azure's complexity requirements}
In the 'Networking' section, set "Allow Azure services and resources to access this server" to "Yes". This setting may default to "No" or not be set, in which case an import from an Azure container may fail.
The selections on the 'Networking' and 'Additional settings' sections can be left as default.
Click "Review and create". Azure then validates the selection.
Click "Create" once the validation has finished. Azure deploys the server, which may take some time.
Click "Go to resource" once deployment has finished.
NOTE: If the client has an on-premise active directory, Azure Active Directory (Azure AD) should be set up. It is recommended that only Azure AD authentication be used.
Comments
0 comments
Please sign in to leave a comment.